 |
| My slightly foxed copy of RuneQuest 2. |

Thoughts on Role Playing Games and possibly beer.
Friday, November 27, 2015
RuneQuest Kickstarter Launched Today
Sunday, October 18, 2015
Free digital topographic maps
From the US Geologic Survey, digitized maps for downloading. For you Call of Cthulhu buffs, how about an 1894 Newburyport map?
 Wish I had time to pull some of these into GIMP to play with.
Tuesday, October 6, 2015
Random Ocean and Island Terrain Tables
Earlier today there was a request on G+ for ocean and water terrain tables. I don't know of any and the lack of them dates back to the 1e DMG, which stated that the DM must draw them in by hand. Chivalry & Sorcery has a similar statement.
I think the biggest reason no one published them is that you can't reliably randomly generate a meaningful coast line, there's no guarantee in these tables that your coast won't encircle your map or have a strange gap in it. I've tried to control for that by assuming that you map the coast while you sail along it, but your result WILL vary.
If you have any suggestion for improvement leave a note, drop me a line or put a message in a bottle and heave it overboard. Of course, I'm up near the falls of the Mississippi, so the last probably won't reach me.
Ocean Terrain Generator
| Roll | Deep Water | Shallow Water | Island | Big Island | Coast Trends |
| 1 | Deep Water | Shallow Water | Reef | 5 Hex | Continues in same direction |
| 2 | Deep Water | Deep Water | 1 Hex | 5 Hex | 1 hex face left |
| 3 | Deep Water | Shallow Water | 1 Hex | 5 Hex | 1 hex face left |
| 4 | Deep Water | Shallow Water | 1 Hex | 6 Hex | 2 hex faces left |
| 5 | Shallow Water | Deep Water | 2 Hex | 5 Hex | Continues in same direction |
| 6 | Deep Water | Shallow Water | 1 Hex | 5 Hex | 1 hex face right |
| 7 | Deep Water | Shallow Water | 1 Hex | 5 Hex | 1 hex face right |
| 8 | Deep Water | Shallow Water | 1 Hex | 5 Hex | 2 hex faces right |
| 9 | Deep Water | Reef | 2 Hex | 6 Hex | Continues in same direction |
| 10 | Shallow Water | Shallow Water | 1 Hex | 6 Hex | Continues in same direction |
| 11 | Deep Water | Shallow Water | 1 Hex | 6 Hex | 1 hex face left |
| 12 | Deep Water | Reef | 1 Hex | 7 Hex | 1 hex face left |
| 13 | Deep Water | Shallow Water | 2 Hex | 8 Hex | 2 hex faces left |
| 14 | Deep Water | Shallow Water | 1 Hex | 7 Hex | Continues in same direction |
| 15 | Reef | Island | 1 Hex | 8 Hex | 1 hex face right |
| 16 | Deep Water | Shallow Water | 3 Hex | 9 Hex | 1 hex face right |
| 17 | Deep Water | Shallow Water | 1 Hex | 10 Hex | 2 hex faces left |
| 18 | Deep Water | Shallow Water | 3 Hex | 11 Hex | Inlet or fjord, coast line comes back out the same face it entered. Roll 1d6-2 (min 1) to determine depth of fjord in hexes. |
| 19 | Deep Water | Island | 4 Hex | 12 Hex | Continues in same direction |
| 20 | Island | Shallow Water | Big Island | Coast | Continues in same direction |
Deep Water vs Shallow Water - There's no set depth dividing the two, shallow water effects (shortening wavelength as determined by the distance between the wave crests and heightening of the crests) occurs when the depth of the water < 1/2 the the wavelength .
For practical purposes, deep water can be considered anywhere where you can't sound the bottom due to the depth. Sounding the bottom is done with a 150 foot lead line, marked off in 6 foot fathoms.
Reef - a rock or formation lying below mean low water, but protruding up from the surrounding sea floor.
Island - approximate size in hexes or squares if that's what you're mapping on.
Coast - The first time you encounter a coast it will be perpendicular to the direction you are sailing. Use this column when as you sail along it to determine how the direction of the coast changes in reference to the direction of travel.
Saturday, October 3, 2015
Module Review: AX1: The Sinister Stone of Sakkara
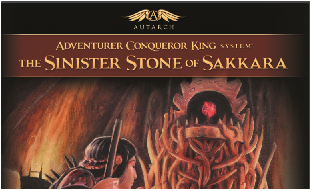 The Sinister Stone of Sakkara is Autarch's first adventure module. It's set in their default Auran Empire campaign and integrates with all of their existing products - Adventurer Conquer King and Domains at War.
The module itself comes in at 82 pages, including some Old School-esque cartography (the large scale maps reminded me of a sort of cross between Hommlet and Panzer Blitz), gridded layouts of every building in the fort as well as the dungeon and a couple of stunning full color illustrations. Overall the art work is top notch.
The module starts with the background of the area, a thumbnail sketch for the more distant past and a detailed reasoning for why the fort is currently under strength and hiring adventurers. Each room and building in the fort, as well as the local inn, are meticulously detailed and drawn on a grid. Even the latrines are detailed. The overall fort and it's environs rates a large scale (55ft) hex grid. This section includes stat blocks for minor NPCs inline with the text. This section ends with the table of regional trade modifiers and a stat block of the domain as a whole.
The next short section details ten important NPCs who may function as patrons, allies or opponents as the characters move through the module. That takes us about half way through the booklet, but it as intended, it provides enough detail for a party to use the fort as a base of operations, and possibly even take it over as their own domain through course of play.
The adventure itself starts with a short hexcrawl. While the dungeon location isn't known to the plyers or NPCs, liberal tracking rules and a short list of potential random encounters will allow most parties to find the dungeon in the first couple of days of exploration.
The dungeon itself is very old school, as in 'Let's take a sheet of graph paper and seen how many rooms we can get on one level'. With the large number of rooms the designers were able to fit in a number of factions competing with each other for the boss' favor. The writeups for each faction gives their relationships to each other and what the cost of a non-combat encounter will be for the party. The first level is very well put together, providing as many opportunities for role playing as for combat.
The second level has fewer rooms, more dangerous monsters and more of a creepy feeling with the presence of slimes, jellies and flesh altering mutations. This is the home of the boss as well as the fount of evil blighting the area.
The module ends with some notes about other places in the sandbox for aspiring adventurers to play and with a set of pre-gen characters.
The adventure is geared for starting characters, and if you're coming from the more recent editions of D&D, you'll be shocked at how under powered the NPCs seem to be. But that's part of the charm of ACKS for me, not everyone is a superhero. I can see a the players experiencing a TPK within the dungeon; I can also see them fast taking their way into a romp behind some of the NPCs - of course they wouldn't get much experience from that.
The off putting: Some of the side bars showing how it integrates with Domains at War break up the flow of the adventure. I don't need calculations showing how the stable holds enough hay for 60 horses at so much gold and oh, by the way that's exactly the maintenance cost for sixty cavalry in Domains at War. It's good to point out that it meshes seamlessly with Domains at War, but one note to that effect would have been enough. A page of tables so you can randomly generate every dish at a decadent banquet - why? The "1980's Sex, Drugs and Metal Memorial Rule" under the somewhat NSFW illustration, I just don't see the connection (with the 80's that is. The rule and the illustration go together). Some campaign setting information is referenced without any explanation - like "The dwarves of Azen Radohk". Where is Azen Radohk, how does it relate to the sandbox?
 |
| Encyclopedia Orc |
Will I run the module? Maybe, that would involve getting the band back together, they might not want to invest in a rule book for a one shot and I don't have time or energy currently to run a campaign.
Wednesday, June 24, 2015
Tomb of the Prophets - A Ready Made Real World Dungeon

Tomb of the Prophets
Saturday, June 20, 2015
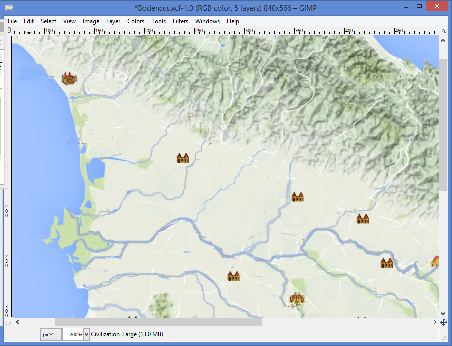
Building Campaign Maps with Google & GIMP 8 - Adding Symbols with GIMP
Own of the issues I've struggled with
in GIMP is drawing regular shapes, much less complex shapes like concentric circles or stars. After all it's image
manipulation, if I wanted to draw shapes I should use Inkscape. But I
have worked out a way to import and add any map symbols I want using
GIMP. The key is in the Brush tool, Section 9.2 of the GIMP
instructions provides the steps required to create your own brush.
And in GIMP, a brush can be any shape or pattern.
 |
| Section of Tablua Peutingeriana |
Start by drawing or finding an image with the symbol you want to use. Because of my opinion of my artistic talents, I am using a section of the Tabula Peutingeriana from a copyright free image on Wikipedia. The +British Library also has a section of the map in it's Flicker stream, but didn't contain all of the images I wanted to use.

Here, I've take the section with the image I want and blown it up in GIMP for easier image manipulation. I've selected the symbol I want to use in my map and copied it to the Clipboard.
Tip: When using the Selection tool, the size of the selected area is displayed in the bottom bar of the GIMP window, in the message area to the right of the cursor position. This is important for the next step.

Next I create a new image (File -> New), with the dimensions of the selection and under the Advanced Options, set the Fill to Transparency.

I've pasted the selected area from the Tabula into the new image. Pretty, isn't it? But I only want the city, not the land, roads and sea around it.


Click Export on the dialogue box.

Now when I look at the Brushes Dockable Window (Windows -> Dockable Dialogues) in GIMP I see my new Brush (the highlighted square) Note that GIMP automatically made the Clipboard selection into a temporary brush. It's built in and can't be cleared, don't worry about it, it disappears the next time you open GIMP, but your new brush remains!
Re-size your brush to produce the size of the symbol you want to appear on your map, place the cursor and click. You've successfully added it to the map.
I hope that this will be of use to some people, the other campaign cartography posts are collected below.
Building Campaign Maps with Google and GIMP series One, Two, Three, Four, Five, Six, Seven
Mapping Pavis (Inkscape) series - One, Two
Thursday, May 21, 2015
This is not me
Very strange to see my name in the Google feed. I had no idea there was another one of me running around playing D&D. Of course, the other me got to work on RPG's rather than driving ships and writing code.
Monday, May 4, 2015
Star Wars Night
Watching the Twins and A's play what should be baseball, but seeing the As booting the ball around the infield (can't believe they've only been charged with one error), it's obvious that the Twin's starting pitcher Phil Hughes is using the Force to keep the home team in the game.
They even gave away a Hughes the Force bobblehead.

They even gave away a Hughes the Force bobblehead.
Friday, May 1, 2015
Three Thoughts on Carcosa
I've been aware of the unofficial Carcosa supplement for some years, but never saw it in the wild. A couple weeks ago I picked up the version put out by and for Lamentations of the Flame Princess.
1. DriveThruRPG keeps it behind the Adults Only barrier due to it's disturbing nature. Well, if you're a 13 year old with an over-active imagination it might be disturbing. The fact that almost of of the magic in the book involves sacrifices of sentient beings, some with very specific requirements as to sex and age - well it's not something I would have come up with but nothing nightmare inducing. It will make SJWs howl, so keeping it where you have to log in and look probably saves them some bad press. And the names given to the rituals ate fantastic, who doesn't want cast "Geometries of the Labyrinthine Spaces" instead of Maze?
2. If my players came to me and asked to me to run it, I would. But contra my thoughts in 1. above, I wouldn't do it around kids. I don't need blow back from the players spouses - or my own. Also, the villains would always be working on a ritual demanding a sacrifice that could be fulfilled with one of the players. Players characters with real skin in the game with a vengeance.
3. The mashup of Cthulhu Mythos background with space aliens and their weaponry is like the love child of Sandy Petersen and Dave Arneson's imagination. Very cool and if I don't run it directly, I'll certainly incorporate pieces in my gaming. You could very easily incorporate as written in RuneQuest, Call of Cthulhu or any other BRP derivative. Other Old School systems would require more work, but nothing too extensive.
Wednesday, April 29, 2015
Mapping Pavis II - Building the Neighborhood


Switching to the Infrastructure layer, I'll add in the city wall, which starts near the bottom right and exits about half way up the left side of C9. A simple rectangle for the Griffin Gate itself and then a straight road leading out from the gate. There needs to be other major streets in the town, so I'll add one in branching off of the gate road and going through C9. It roughly parallels the wall, but I don't want it to be straight, as my conception of Pavis is that, unlike Greek and Roman towns, it was laid out haphazardly.
I'll start with the block four down and three in from the left and map the buildings with in the bock on the 10x10 square drawing I made earlier. Again export from GIMP as a PNG file, open the PNG in Inkscape and save a an SVG file. I only need two layers on this drawing, 'Grid' and 'Buildings'. Again, I move the background grid to the Grid layer and add the wall section so guide my layout. I'll need to leave a gap for the street cutting across the corner of the square too.
Now to generate the buildings, of course I built a generator, I always do. It's linked over on the sidebar. When I built the generator, instead of setting to always build a 100x100 meter block of buildings, I set it so that it randomly selects a 'Nominal block size' and creates contents until it meets or exceeds the nominal block size. I'll just run it until I have enough buildings to fill the area. In this case twice, I've reformatted the numbers to make a combined list for the block.
No
|
Type
|
Floors
|
Size
(meters) |
Description
|
|---|---|---|---|---|
C9.43.1
|
E
|
30x40
|
The area is covered with tall weeds. The cellar is made of field stone and has 3 levels. The cellar can be accessed by a open stair inside the left rear corner of the building site. The access has been hidden by brush and weeds. Any cellar floors in the building have a 10% chance of collapsing the first time they are stepped by any individual character. Any stairs or ladders found in the cellar have a 15% chance of breaking the first time they are used. |
|
C9.43.2
|
D
|
10x20
|
The front right corner foundation of yellow
brick remain behind to mark where a building once stood.
|
|
C9.43.3
|
D
|
10x10
|
The rear left corner and right wall
foundations of brown brick remain behind to mark where a building
once stood.
The area is covered with brush, a small tree grows within. The cellar is made of packed earth and has 1 level. The cellar can be accessed by a hatch without a stair outside the right rear corner of the building. The access is hidden by debris. |
|
C9.43.4
|
D
|
10x10
|
The front right corner , rear wall and left
wall foundations of yellow brick remain behind to mark where a
building once stood.
The interior is a shallow pit covered with weeds and bushes. |
|
C9.43.5
|
Empty
|
10x10
|
The area is covered with brush, a small tree grows within. |
|
C9.43.6
|
C
|
1
|
20x20
|
The broken front wall and rear right corner of
adobe remain standing to mark the building.
The area is covered with thorns. The cellar is made of packed earth and has 1 level. The cellar can be accessed by a trapdoor with no means of descent inside the right front corner of the building. The access has been hidden by brush and weeds. |
C9.43.7
|
D
|
10x20
|
The front right corner foundation of yellow
brick remains visible to mark where a building once stood.
|
|
C9.43.8
|
D
|
40x40
|
The left wall foundation of adobe remains
behind to mark where a building once stood.
The interior is a shallow pit covered with weeds and bushes. A pool of water has collected at the bottom. Check for wandering monsters. |
Building Types paraphrasing from Pavis and the Big Rubble.
'A' - Intact and inhabited; 'B' - Open to the weather, but inhabitable; 'C' - Shell of the building; 'D' - Foundations poking up through the grass; 'E' - No remains above ground, may still have intact cellars.

The final step is to turn off the grid (Shift -Control - L) Then click on the eye icon next to the Grid layer in the right sidebar, so that the eye closes.
Click on the drawing, Select All (Control-A), then reducs the scale of the drawing by Object->Transform. Click on the Scale tab in the Transform dialogue on the right sidebar. Set the scale to 20% of the original and apply.
Copy the reduced image to the Neighborhood drawing for the C9 block. Then using the cursor controls, slide it into position in the square 4 down by 3 from the left. Delete the wall segment that was copied over, tweak the building locations to align at this level, including editing the Path for the main road transiting the square and you achieve this.

Repeat for successive sub-squares.
Now I'm not planning on mapping all of Pavis at this scale, just the pieces where the adventures are. I'll keep a couple of generic areas for random encounters.
Monday, April 27, 2015
Mapping Pavis I - Setup

The next step is to be able to drill down to individual buildings. Again I used GIMP to create a large square, first divided into a 5x5 matrix of smaller squares. The large square at this scale represents on of the squares on the Pavis map, which I'll refer to as a neighborhood. The 25 squares inside are 100x100 meter 'blocks".
The final layer is another large square, subdivided into a 10x10 matrix. The large square represents the 'block' in the neighborhood map and is subdivided into 10m2 'lots'. Or about 30x30 feet - not coincidentally the size of the house I owned in the Chicago suburbs fifteen years ago.
Next I'll demonstrate drilling down to the building and block level.
Saturday, April 25, 2015
Urban Ruins
I've created another RPG Playing Aid generator, over under Utilities - Urban Ruins. I created it to generate random urban remains based on the Runequest Pavis and the Big Rubble setting. It will make a group of building remains, providing their footprint, height and a description. It's not so much a dungeon generator as an idea generator.
I'll have a couple of posts showing how I use it to create large scale maps of the Big Rubble.
Here's an example of the results. The 'Type' column is explained over on the Urban Ruins page.
I'll have a couple of posts showing how I use it to create large scale maps of the Big Rubble.
Here's an example of the results. The 'Type' column is explained over on the Urban Ruins page.
Nominal
block size: 40m by 40m
| No | Type | Floors | Size (meters) |
Description |
|---|---|---|---|---|
| 1 | B | 1 | 10x10 | Walls of orange brick support the remains of a black tile
roof. The left wall is stained with mildew. The cellar is made of packed earth and has 1 level. The cellar can be accessed by a trapdoor with no means of descent inside the left front corner of the building. The access is full of debris. If searched or cleared, 25% chance of being attacked by vermin, insects or snakes. |
| 2 | D | 10x10 | The front left corner , right wall and left wall foundations
of finished stone remain behind to mark where a building once
stood. The interior is a shallow pit covered with tall weeds. |
|
| 3 | Special | 10x10 | A well with no lip, just a hole in the ground. . Check for wandering monsters. | |
| 4 | Empty | 30x30 | The area is covered with tall weeds. |
|
| 5 | E | 30x30 | The area is covered with brush, a small tree grows within. The cellar is made of finished stone and has 1 level. The cellar can be accessed by a open stair outside the left rear corner of the building site. The access is full of debris. If searched or cleared, 25% chance of being attacked by vermin, insects or snakes. Any stairs or ladders found in the cellar have a 15% chance of breaking the first time they are used. |
Friday, February 27, 2015
Spock is dead, long live Spock!
RIP Leonard Nimoy. Here's a link to to Leonard singing the Ballad of Bilbo Baggins
Wednesday, February 25, 2015
Book Review - Demon Princes

Yet in the end, we have hundreds of pages of vignettes, the first of the villainous Demon Princes, criminals of shocking callousness and depravity, is a Star King. After its demise, the Star Kings are erased from the universe, never to appear again. So too the hero's love interest du jour. End of book, end of story arc, even when the hero has taken financial responsibility for them. Poof, gone, lost in the vast cosmos.
By my count, only two characters appear on more than one story, other than the hero. And little is done to develop any of them, including the hero. Who ticks away tracking down and assassinating these criminals one by one. His deeds unnoticed by the galaxy and unnoticed by the remaining criminals.
It's a great, fertile setting for a space opera, read the books. Discover Smade's Planet, the Oikumene and the lawless beyond. Have the characters s each for ore among the Darshan on Dar Sai, and let them determine if the climate is more pitiless than the people. Let them journey to far, forgotten Thamber at the edge of the galaxy or take their old Model 9B located ship to search for new worlds.
But the stories themselves, meh.
Saturday, January 31, 2015
Deep Ones in Puerto Rico
These native drawings provide pictorial evidence of Deep One presence and inter-breeding around Punta Escambron, San Juan, Puerto Rico.


Wednesday, January 7, 2015
Je Suis Charlie
A first hand account from someone who happened on the scene after the massacre. Freedom of expression is everyone's fight, there was a minor movement to suppress D&D in the 80's on religious grounds. That was a picayune argument with groups who played by civilized rules; this is an act of war between cultures. Because of the cultural divide, both sides will claim deceit and treachery in course the fight, as the cultures do not share norms of behavior.
That does not make them equal nor equivalent.
Western civilization, with all of it's faults, has a history of self criticism and increasing freedoms that Islam only approached in it's Spanish rump states. Such criticism can be counted on to offend those being criticized, but curtailing the right to criticize must lead to the curtailment of those freedoms.
So if you're offended, sucks to be you. Go ahead and offend me back, being offended is the price of maintaining and expanding freedom. Freedom is cheap at that price. The staff of Charlie Hebro just paid for it in blood.
Honor them,do not let their voices be silenced. Your freedoms depend on it.
Subscribe to:
Posts (Atom)